
Onboarding Check List
Bulk Email: Mailgun | GoDaddy Set Up
Updated: Dec 10, 2022
Estimated time to complete: 20 mins
Below are a list of basic steps you will need to go through to get your new Popmix CRM account up and running.
Most of the steps are better completed by the user before they schedule an onboarding call because they require a user name and password, admin access to external software or are easy enough anyone can do them.
NOTE: The biggest obstacle we have in setting up new CRM accounts is that users do not remember their user names and passwords to other software like Gmail, GoDaddy, Facebook etc. Please have ALL your user names and passwords ready, you will need them often during this set up process.
Primary Objectives:
1) Configure your Mailgun Email so you can send and receive BULK emails via the CRM.
Secondary Objectives:
1) Test sending and receiving email.
Introduction
Mailgun is a bulk email service that is directly integrated into the Popmix CRM Platform. If you choose this service you do not need to use an SMTP email provider as Mailgun will handle the emails. Set up is easy.
This is just an overview not a step by step walkthru for the set up.
You will need a Mailgun account and access to your domain hosting provider (Godaddy, Hostgator, NameCheap etc) the hosting provider controls your DNS.
There are 5 DNS entries you need to make to get Mailgun set up
1) Two TXT Records
2) Two MX Records
3) One CNAME Record
Don't worry it's literally a copy and paste configuration.
NOTE: DNS Configurations are usually accepted in a few minutes but can sometimes take hours to accept the configuration. It just depends on the amount of network traffic.
Be patient...Don't be afraid to click Verify DNS multiple times.Also Only use the Copy button, do not click on the field in Mailgun and copy it from there as that will copy an extra space which will invalidate the configuration.
We have detailed instructions on Godaddy, Hostgator, Cloudflar and NameCheap (the 4 most common providers) but there are additional instructions inside Mailgun.
Bulk Emailing with Mailgun with Godaddy
NOTE: If you do not plan on sending bulk emails (more than 50 per day per user) then you can just use the Basic Email Set Up for4 Column Gmail, Google Workspace or any SMTP Provider.
Step1: Sign up for a paid Mailgun Account.
Step 2: Select a hosting provider where you purchased your domain name or where it is currently being hosted.
Step 3: Configure the DNS for the TXT, MX and CNAME records.
Step 4: Configure the Popmix CRM Email Service
Step 5: Send a message to support@popmixcrm.com and ask them to change the default mail settings to Mailgun.

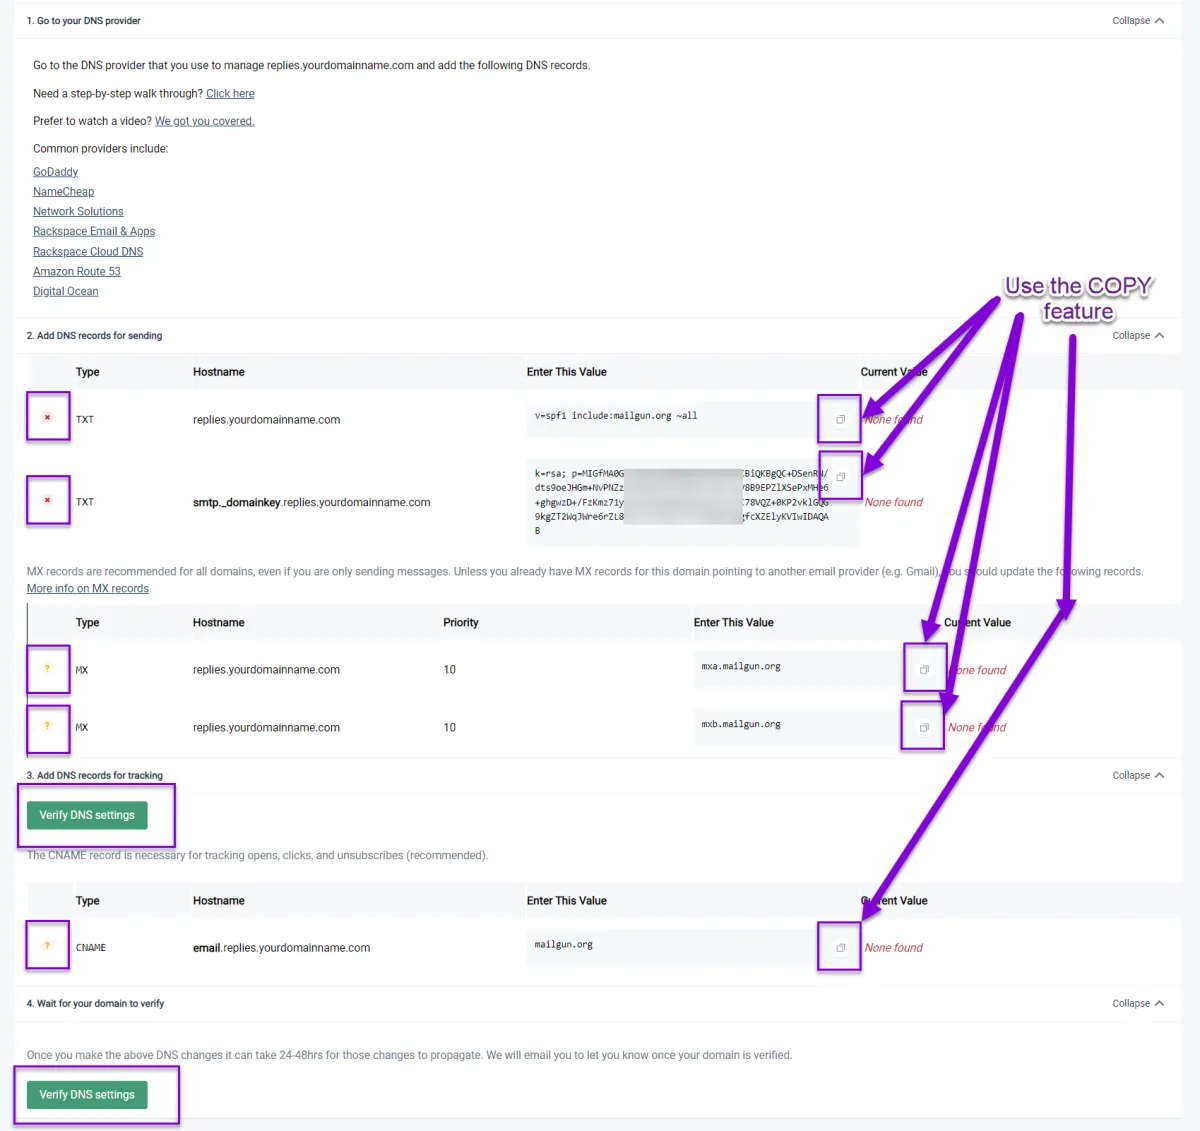
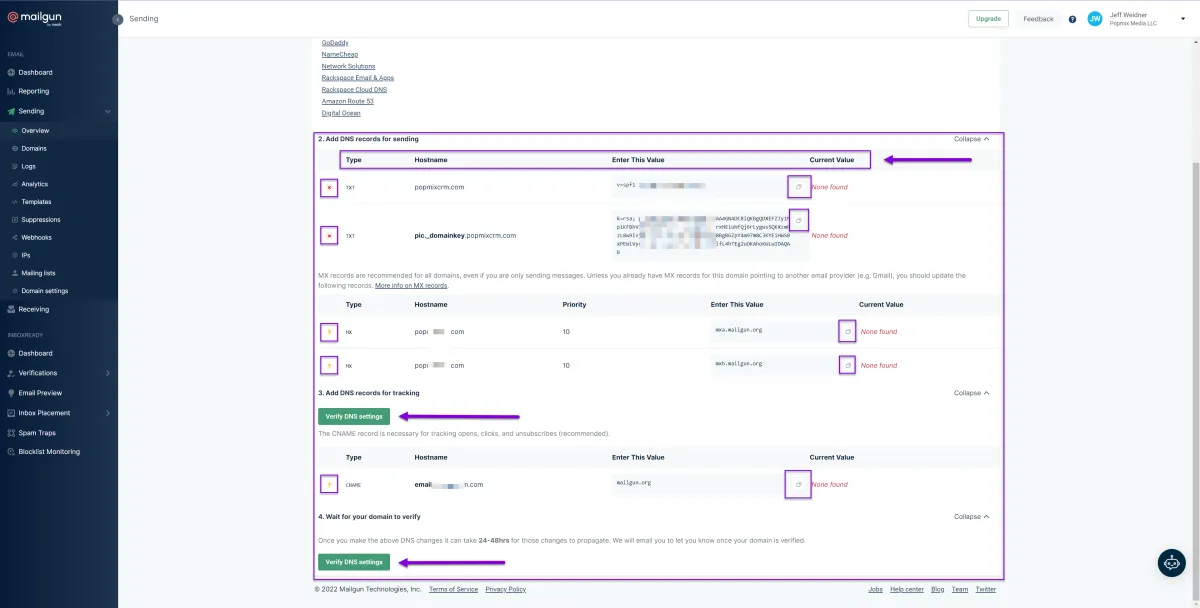
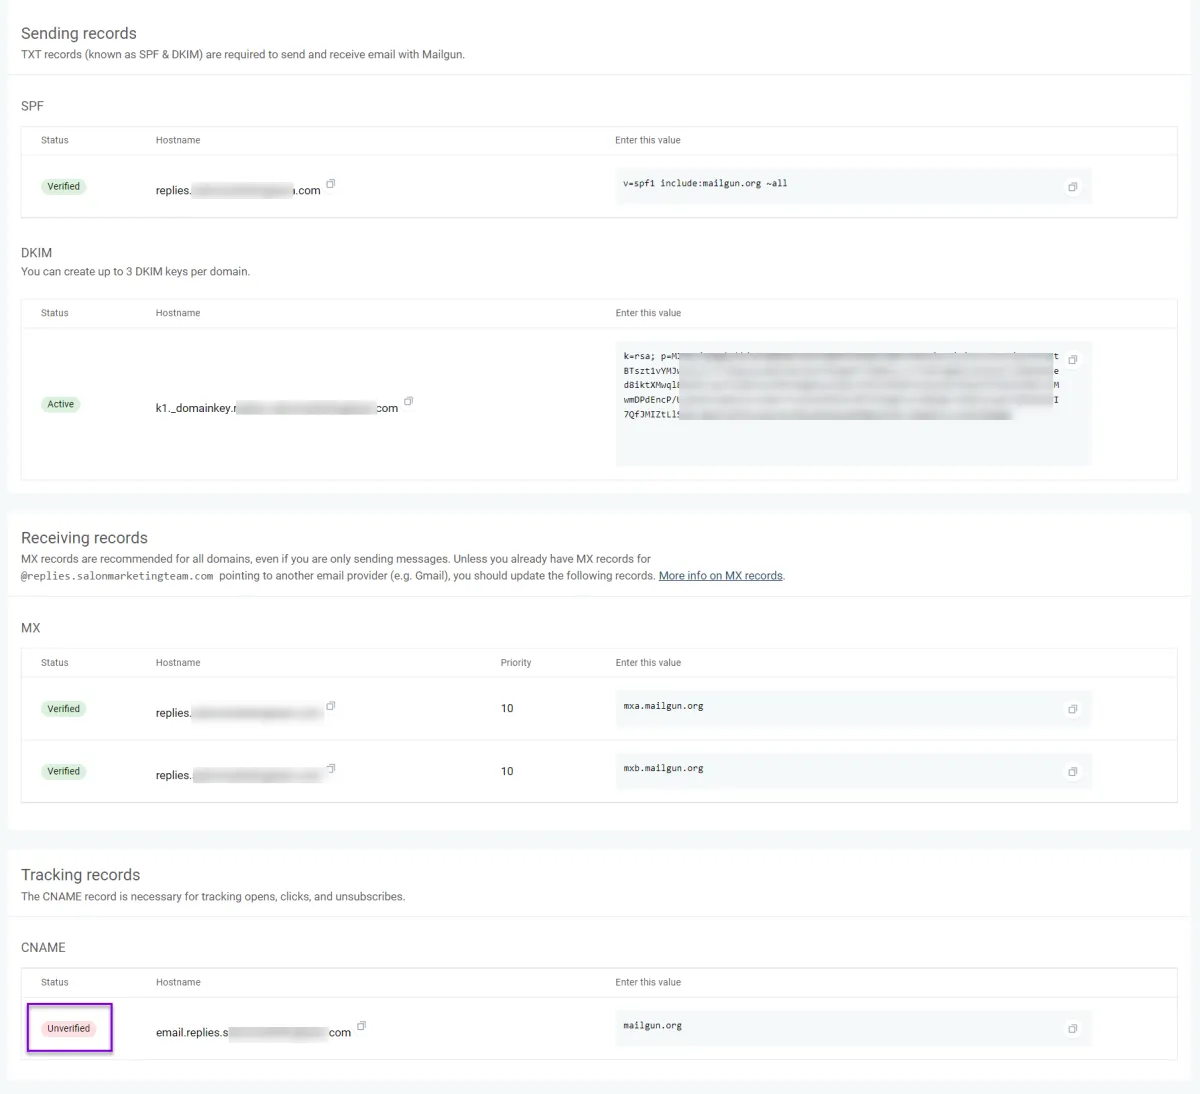
In Mailgun: At this point, this is where you should be inside Mailgun.
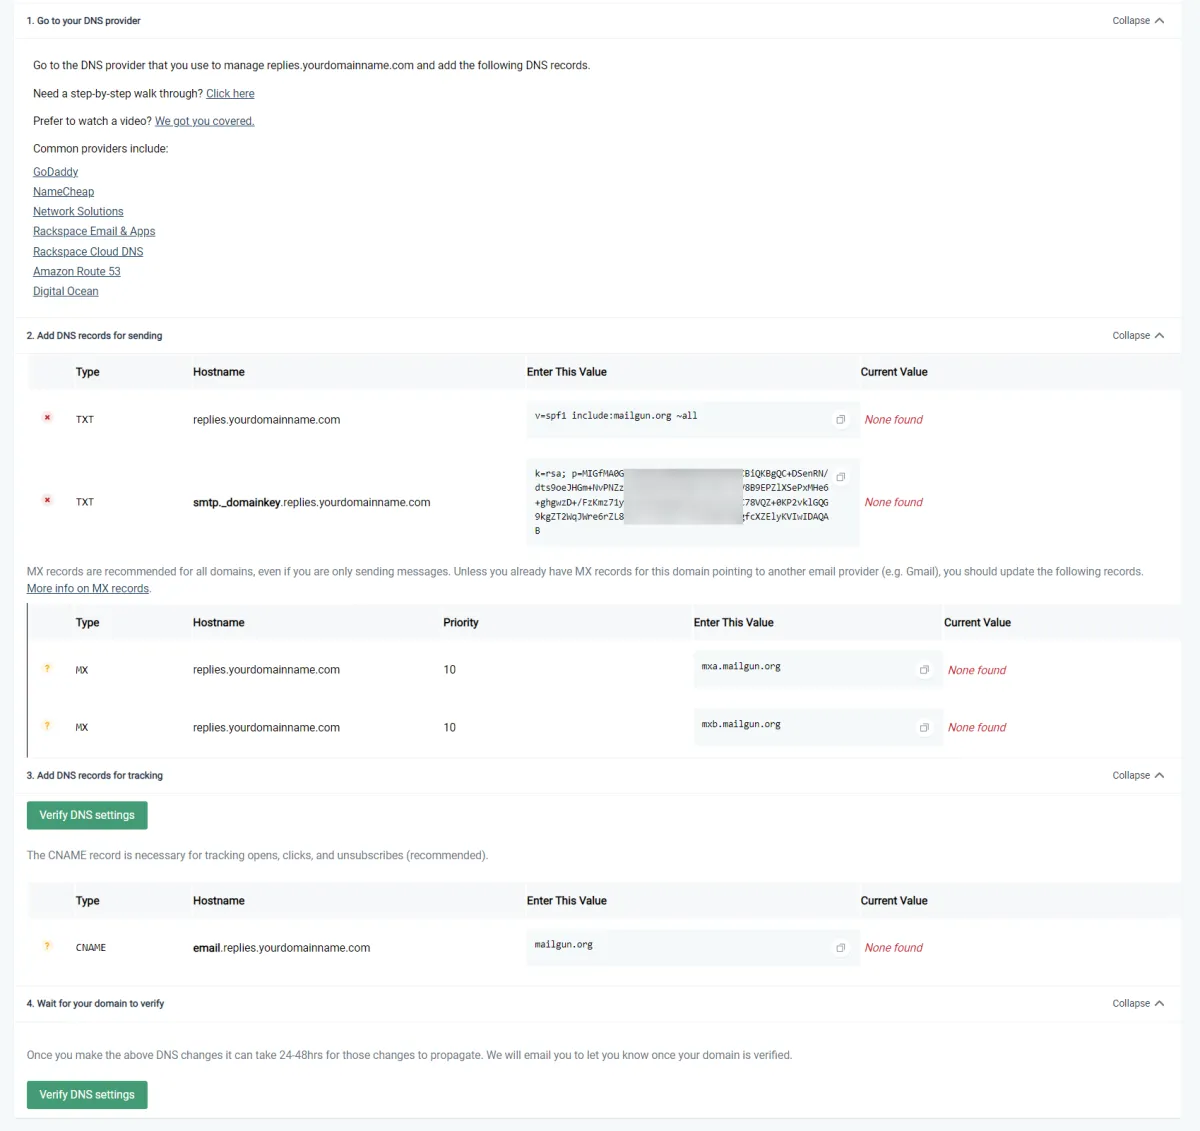
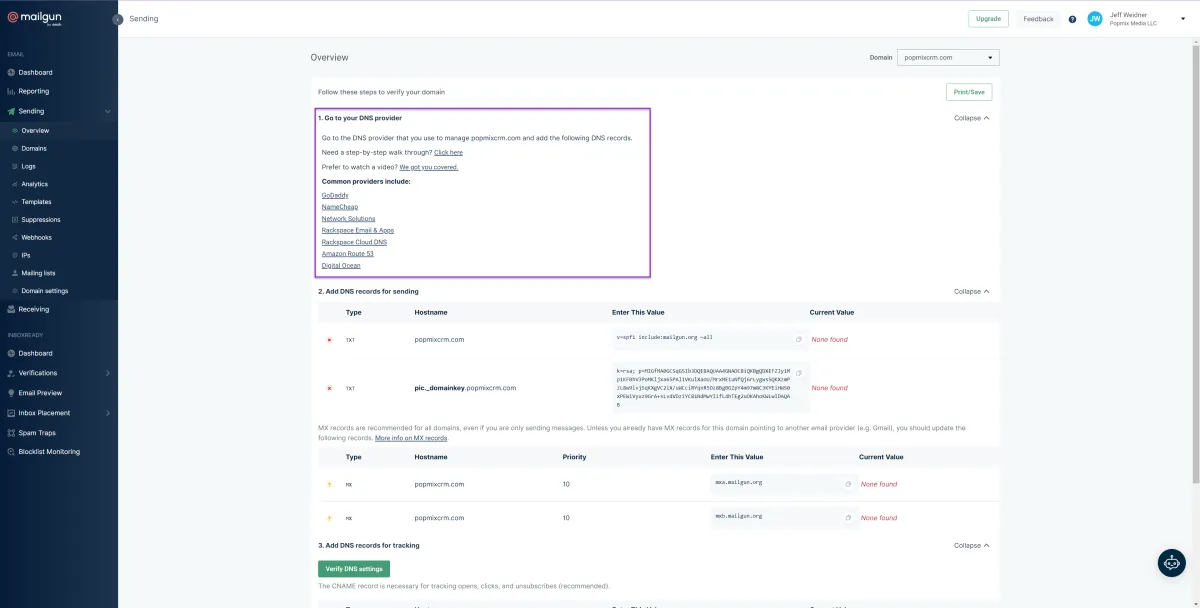
In Mailgun: Same image as the one on the left without the arrows and markup.
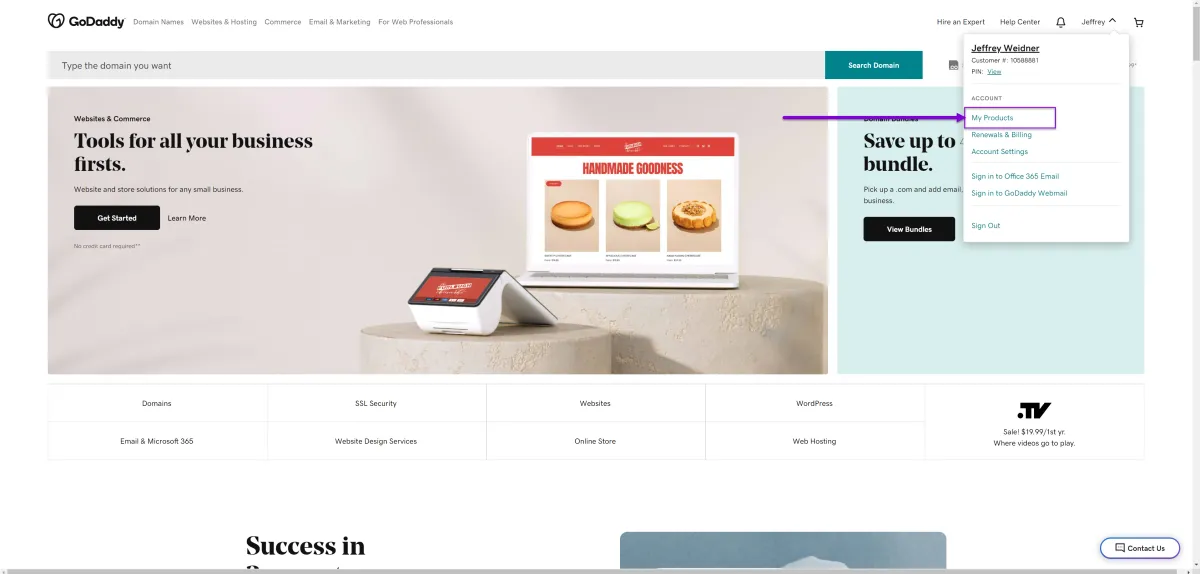
In Godaddy: Log into your Godaddy account and go to My Products.
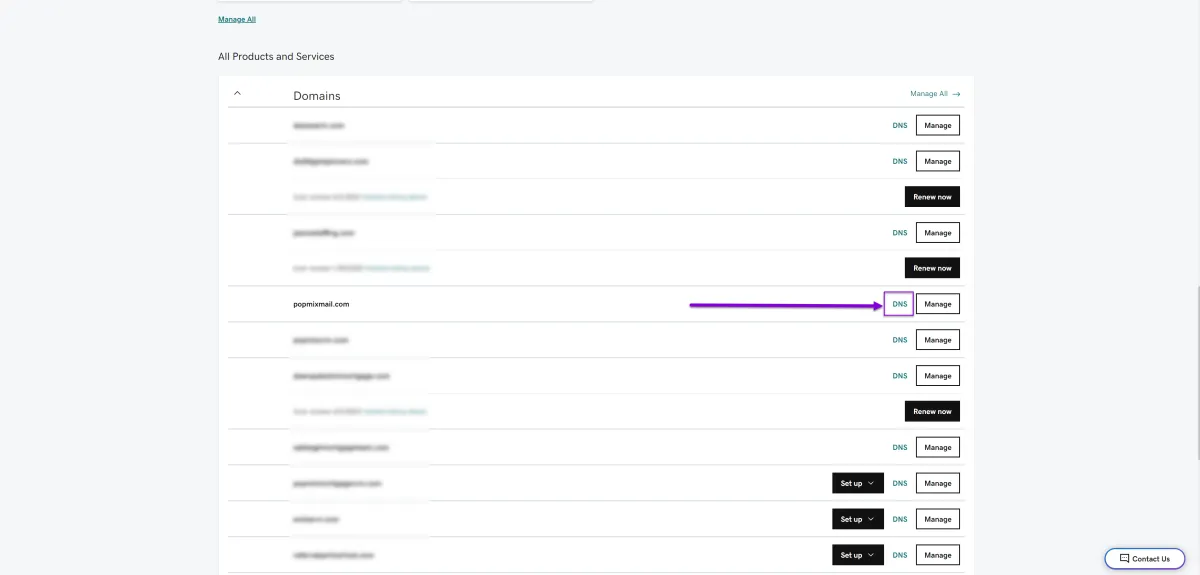
In Godaddy: Choose the DNS option for the Domain you want to use Mailgun
In Godaddy: Click the Add button the DNS Records page
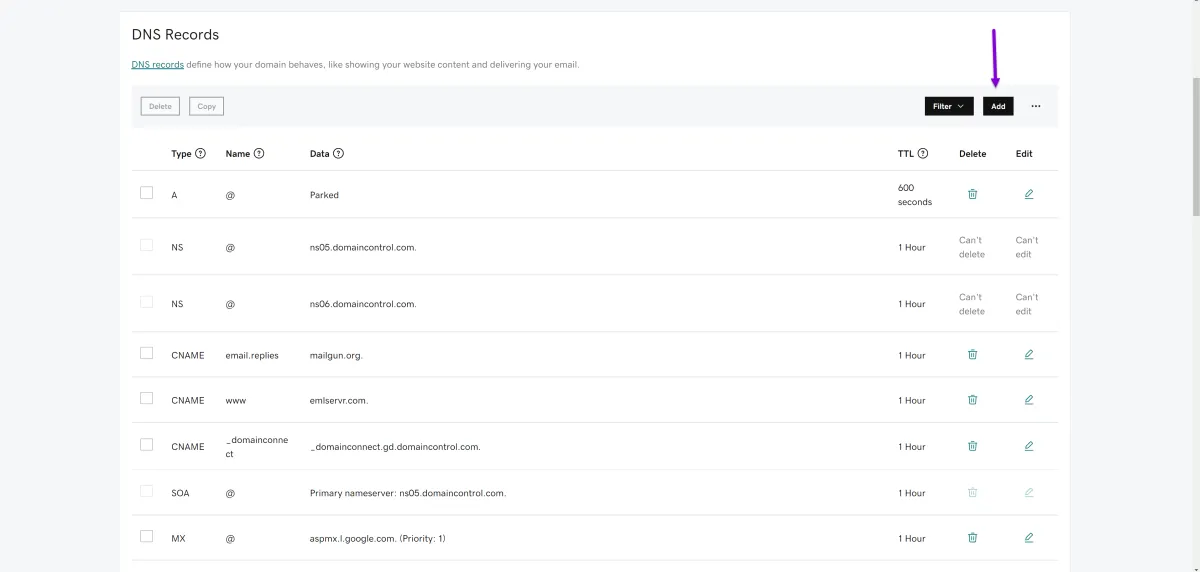
In Godaddy: There are 4 values: Type, Name, Value and TTL
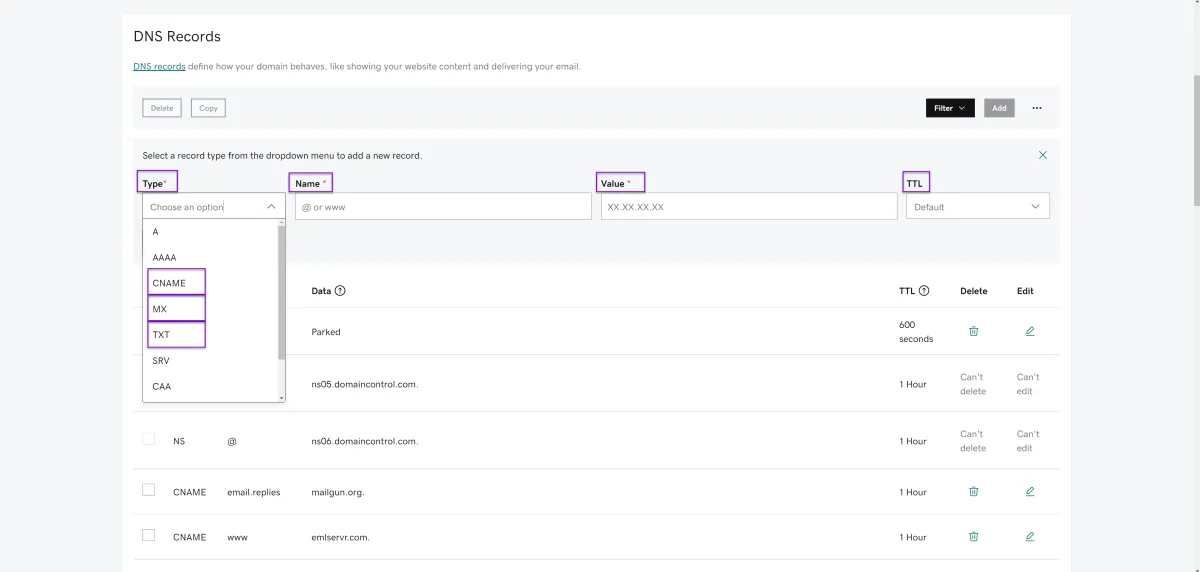
In Mailgun: Take the information out of Mailgun and we recommend you use the copy button to the right of the field as opposed to the highlight and paste.
In Godaddy: Add it into Godaddy one by one for each TXT, MX and CNAME Record listed in the Mailgun account
NOTE: In Godaddy you do not need to enter the entire Name (Hostname) value that is given in Mailgun.
TXT Records should be: mx._domainkey.replies not mx._domainkey.replies.yourdomainname.com
or TXT Record: replies not replies.yourdomainname.com
MX Records should be: replies not replies.yourdomainname.com
CNAME Record should be: email.replies not email.replies.yourdomainname.com
When you are finished you should have
2 TXT Records for Mailgun

2 MX Records for Mailgun

1 CNAME Record for Mailgun

NOTE: You may have other TXT, MX and CNAME Records in your DNS Records that are not for Mailgun. It's best to not change those unless there is a conflict.
In Mailgun: Find the green "Verify DNS Settings" button and click it.
In Mailgun: If you entered all the information correctly you will see a green "verified" oval next to each line item that you entered. If you have any "unverified" red ovals give it a few minutes and try to Verify the DNS again as sometimes DNS takes a few minutes to get recognized by the server. If it's still "unverified" double check the information you entered for that record in Godaddy. Make sure there are no extra dashes, spaces in the beginning or end of the values. Wait a few minutes and try to Verify DNS Settings again. If it still doesn't give you a green "verified" oval that please schedule a call with Popmix CRM Tech Support.
Step 4: Mailgun: Popmix CRM Complete the Set Up
Once your Mailgun and Hosting provider DNS is configured and you get all 5 green checkmarks then you can configure Popmix CRM to send and receive emails from Mailgun.
Onboarding FAQ's
Do I need to update our Company Information?
Yes, you need to update your company information because this information is used in several forms, funnels, workflows and emails. It is especially used for keeping all client account compliant with CAN-SPAM and TCPA Laws.

Can I use a Free email, paid SMTP and Bulk email at the same time?
No, you can either use a Free OR a Paid SMTP service provider OR you can use Mailgun as a bulk email service provider you can't use both.

Do I need to use Mailgun as a Bulk Email provider?
Technically, no. We highly recommend using Mailgun. We can not provide technical support for non-Mailgun Bulk Email users. Other Bulk email service providers that have been successfully integrated with Popmix CRM are
Just about any SMTP provider can be implemented but we can't be experts on every platform in the market.
What should I do if my emails are landing in recipient Spam folders?
Email can land in the spam or Gmail Promotions folder for a variety of reasons.
1) First and foremost don't send Spam. Spam is an unsolicited email regardless of your intent to sell anything if they did not specifically opt-in to receive a n email then it could be considered Spam.
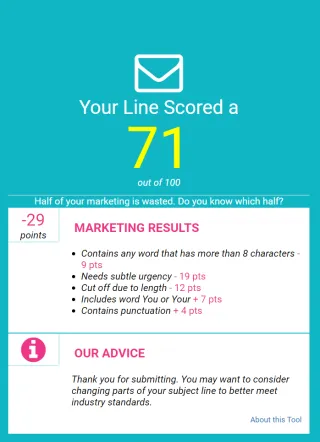
2) Use a Subject Line tester such as https://subjectline.com/ or http://emailsubjectlinegrader.com/ to test or grade your subject line and show you how likely it is to be considered Spam.
3) Set up your SPF, DKIM and DMARC.
SPF, DKIM and DMARC are simply a set of email authentication methods to prove to ISPs and mail services that senders are truly authorized to send email from a particular domain and, are a way of verifying your email sending server is sending emails through your domain. Google has a good article to c fall asleep to that explains how to set up these up.
SPF Article : https://support.google.com/a/answer/33786?hl=en#to-do
DKIM Article : https://support.google.com/a/answer/174124?hl=en
DMARC Article : https://support.google.com/a/answer/2466563?hl=en
Why do you recommend Google Workspace Accounts?
1) They are cheap! Starting $6 a month and you can send a lot of emails.
2) They are really easy to set up. Most users can set these up themselves in less than 30 mins.
3) Google Workspace is fully integrated with Popmix CRM and allows you to use a lot of other Google solutions like, Google Analytics, Google Ads, and Google Messages etc